Main Content
Calendar and Contacts with Android using DAVx⁵
This manual describes the synchronization of calendars and contacts (webmail address books) with Android. To retrieve e-mails on your Android device, please configure a separate mail account with the data under Mail Program Settings.
Most smartphone and tablet manufacturers provide Android with a customized interface, so that the settings on your Android device do not necessarily have to look the same but the input fields and configuration options should be the same on all Android devices. The following only shows the setup for students with a Student Account. Staff Accounts are set up in the same way.
CalDAV settings in Webmail
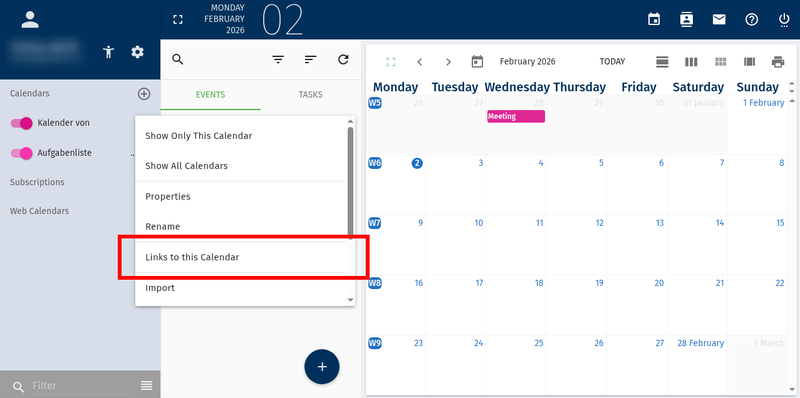
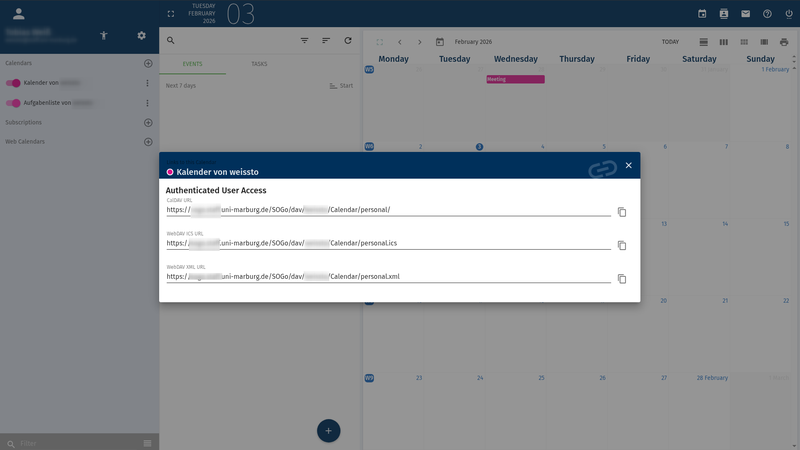
A "CalDAV" path must be specified as the server path. This can be found in Webmail by clicking on the three dots next to the respective calendar under "Links to this calendar".
Setup CalDAV-Account in DAVx⁵
DAVx⁵ is a CalDAV/CardDAV management and synchronization app for Android that seamlessly integrates with calendar and contacts apps and is available for free via F-Droid or for a fee via the Google Play Store.
- Open the DAVx⁵ app
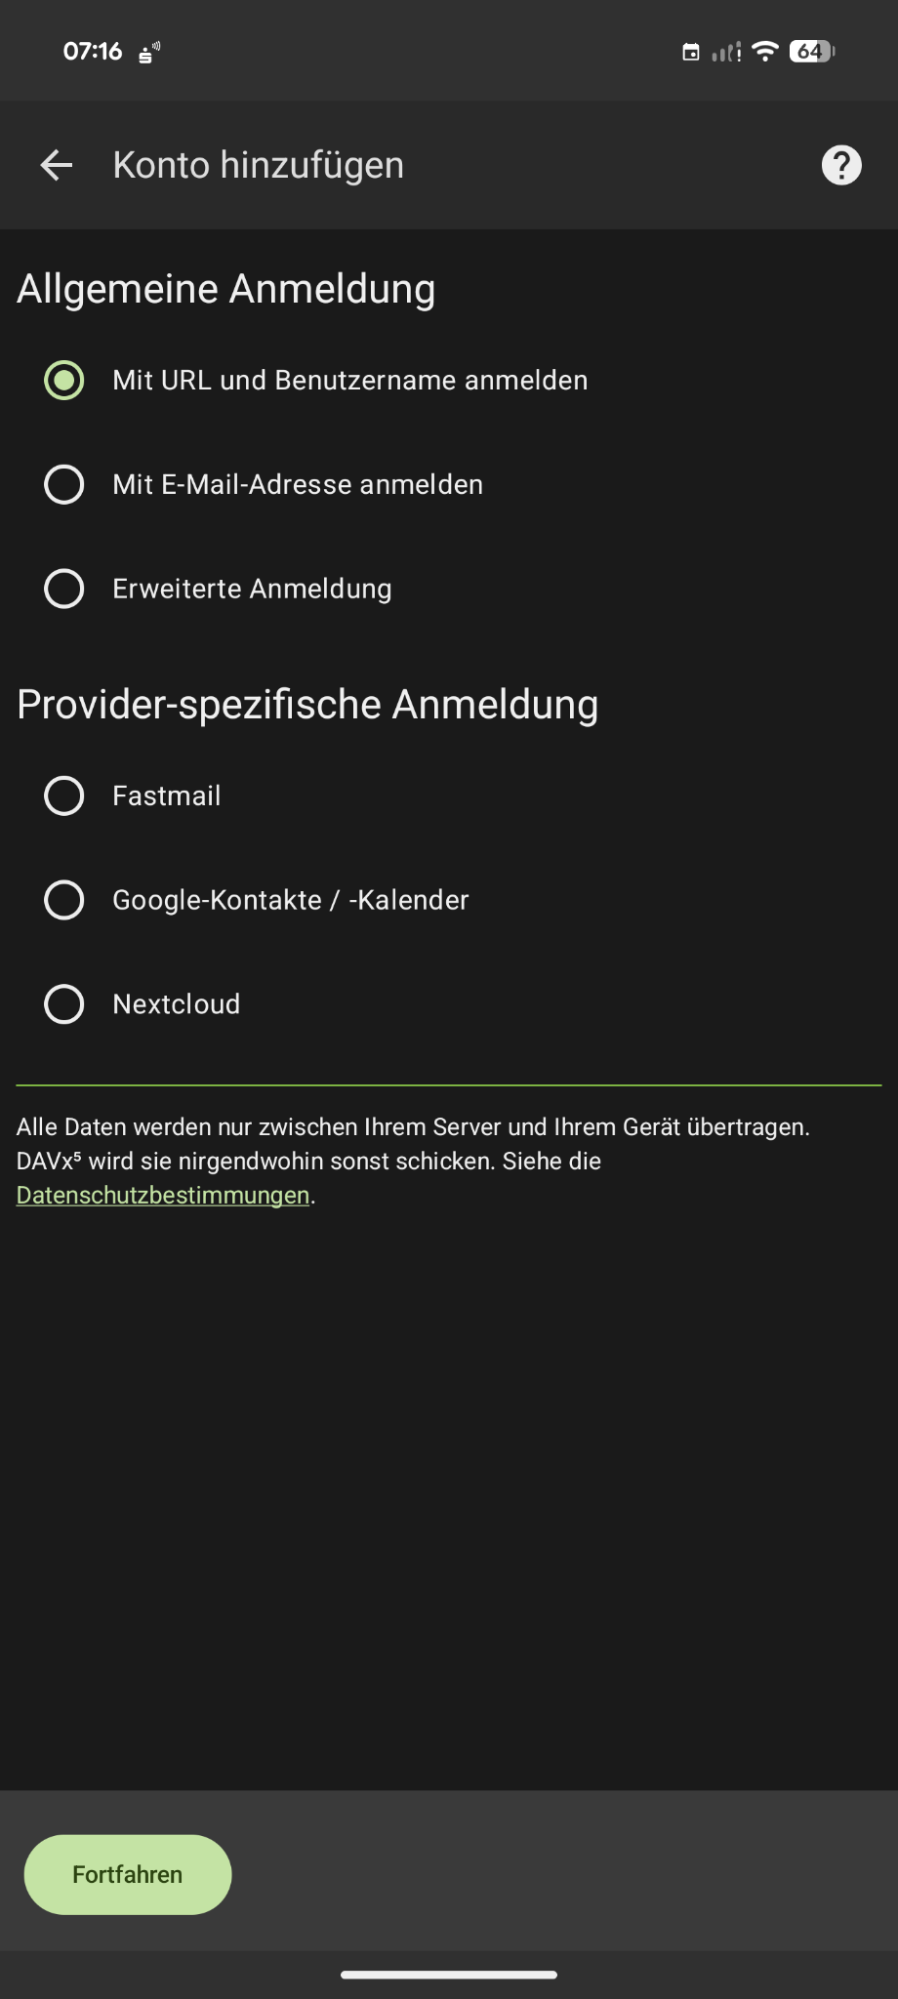
- Add account: Tap the plus icon (+) to add a new account.
- Choose login method: Select "Log in with URL and username."
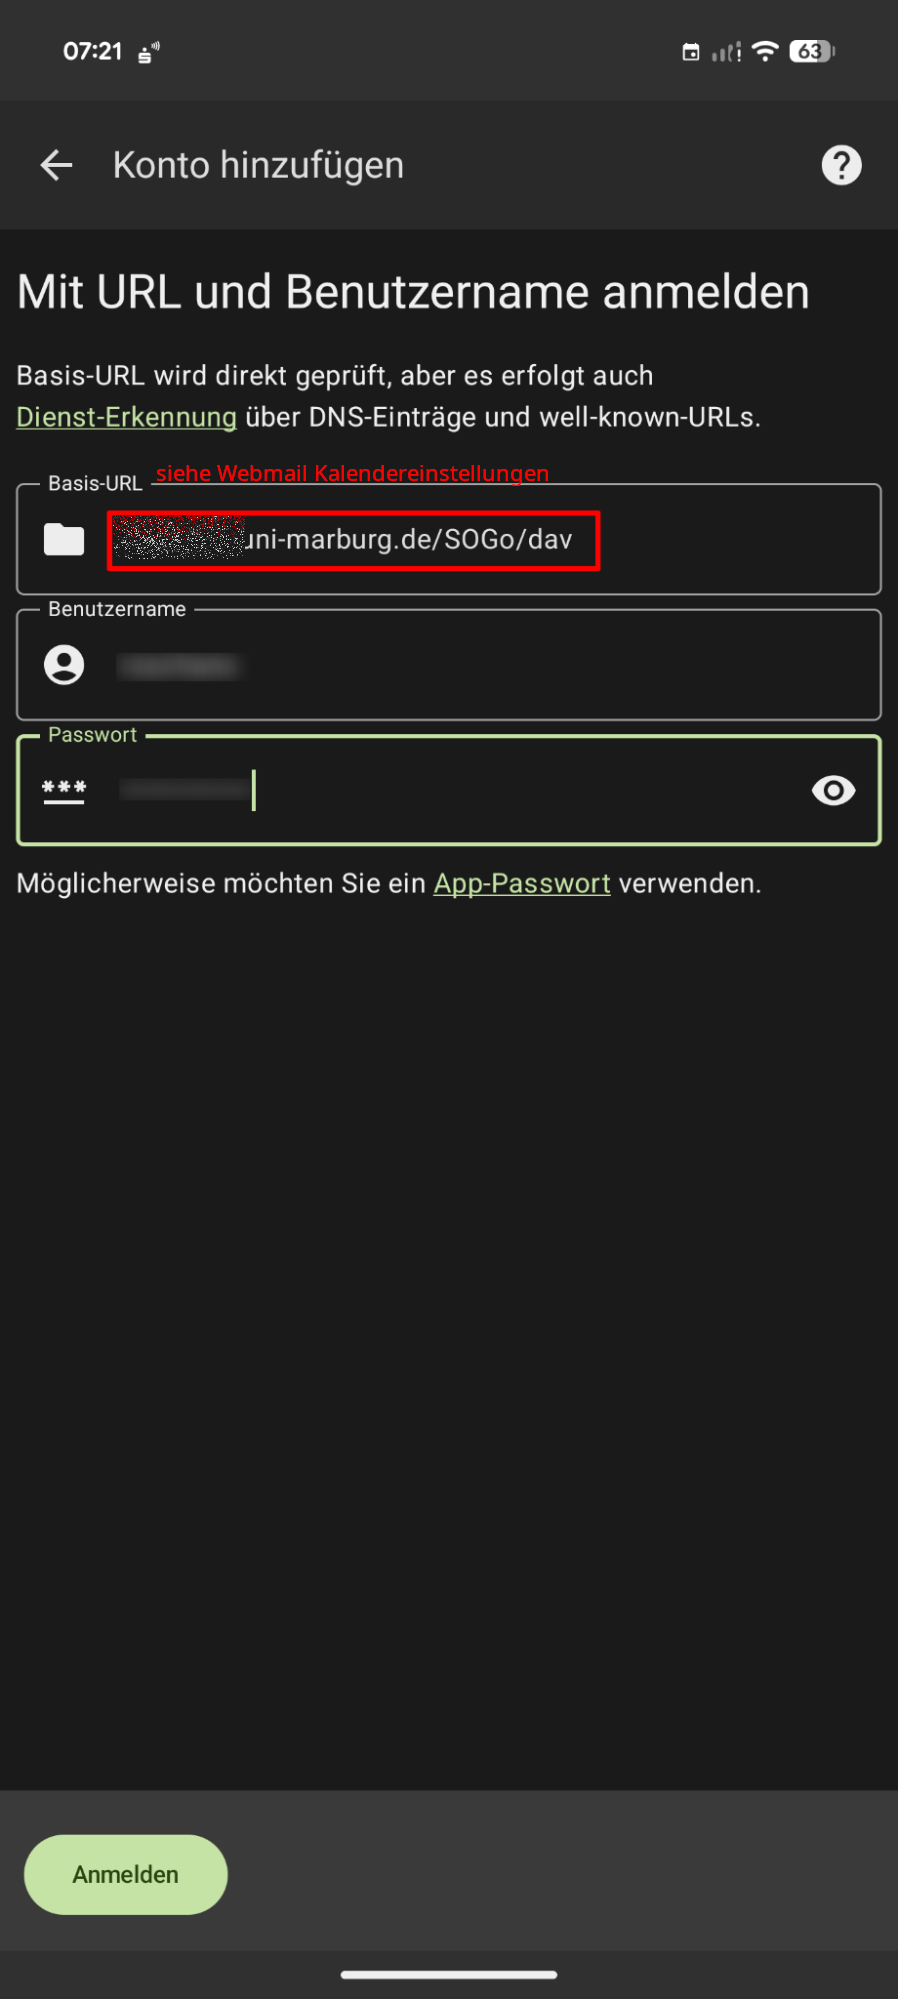
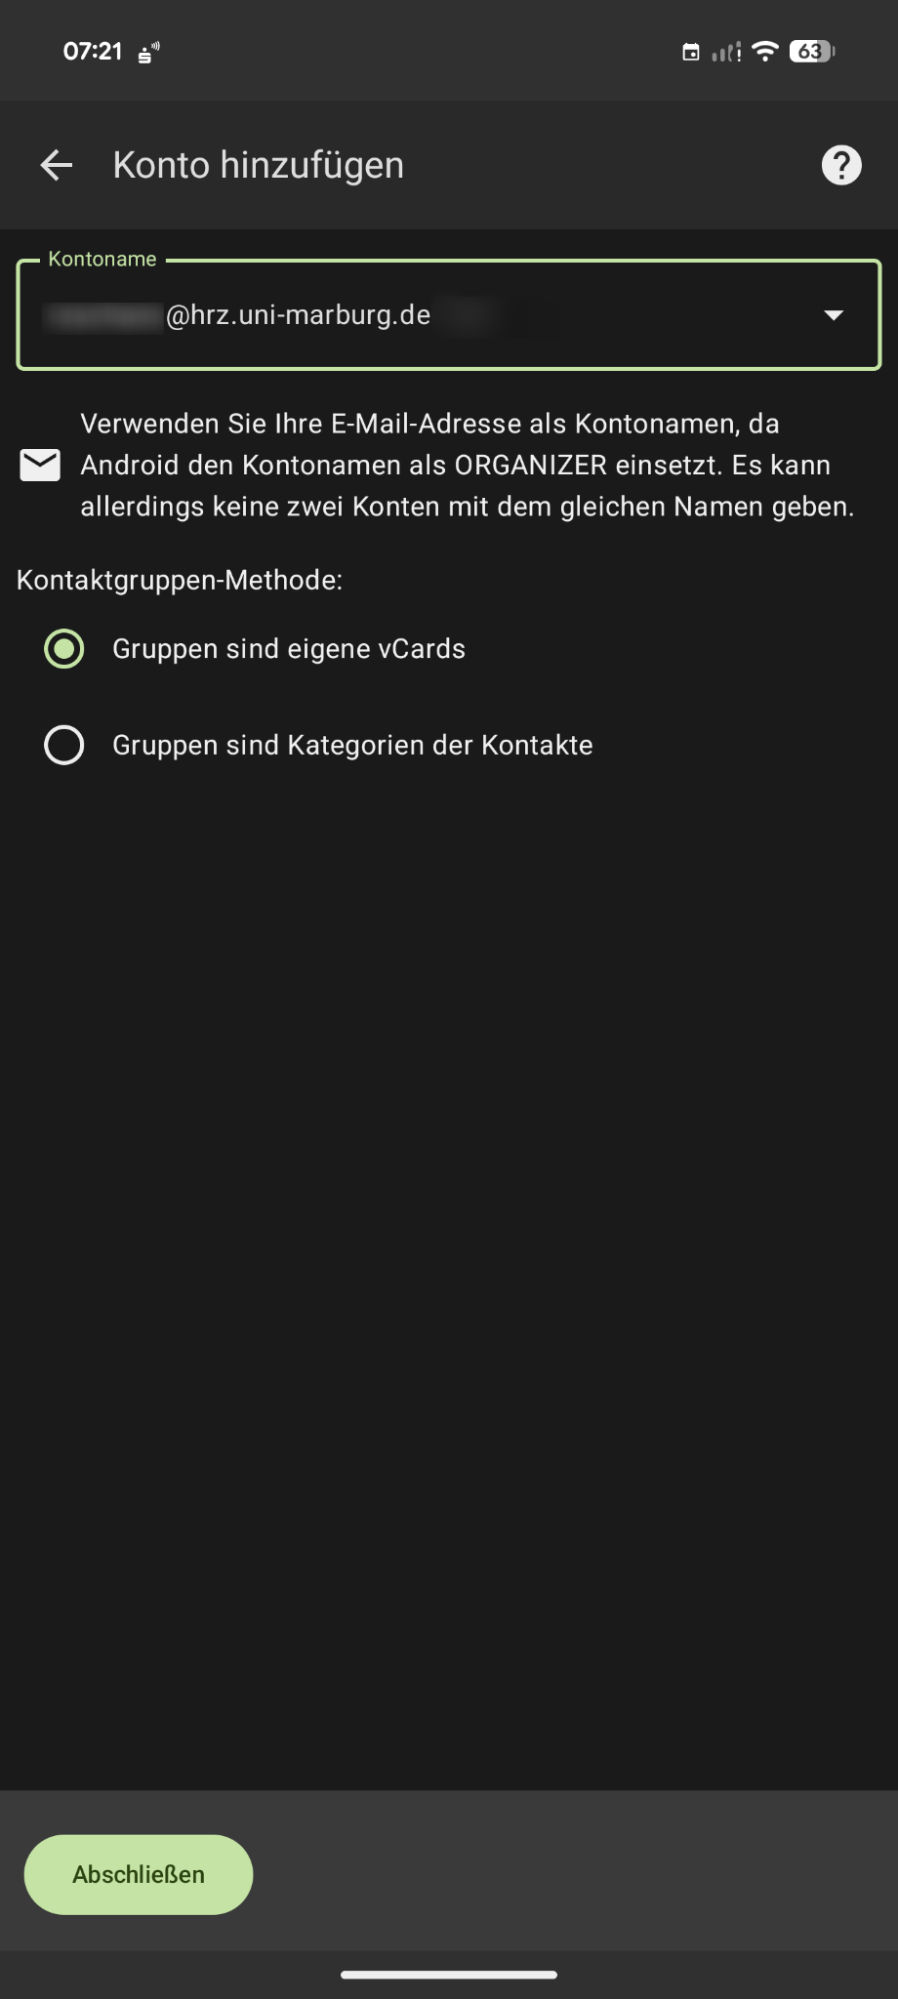
- Enter your login credentials.
- Log in: DAVx⁵ will now connect to the server.
- Account name (optional)

Sync: Tap the "Sync now" button (the one with the round arrows) at the bottom to instantly download the selected calendars to your device.
Activate calendars in the Google Calendar app
Once DAVx⁵ has synced the calendars, they will be known to the Android system. Now we just need to tell Google Calendar to display them.
- Open the Google Calendar app.
- Open Settings: Tap the menu icon (☰) and scroll all the way down to "Settings".
- Manage accounts: In Settings, tap "Manage accounts".
- Check account: The DAVx⁵ account will now be in the account list. Make sure the switch for this account is ON.

Further Resource
Official DAVx⁵ documentation is also available as a further resource.