Main Content
Guide - How to use KeePassXC
KeePassXC is a further development of the password manager (password manager software) KeePass. With a password manager you can securely store access data for any number of applications and websites, including annotations for them. This makes it easy to use different, long and secure passwords for all accesses, since you don't need to remember the passwords, but only the one for the password database.
New with KeePassXC is the browser integration, so the login in browser windows can be supported directly with data from KeePassXC.
KeePassXC can be made available on all Windows workstation computers that are automatically installed and maintained by the HRZ.
Click on the images in this guide to enlarge the view.
Instructions
Structure of the application
The main view of the database is divided into three sections.
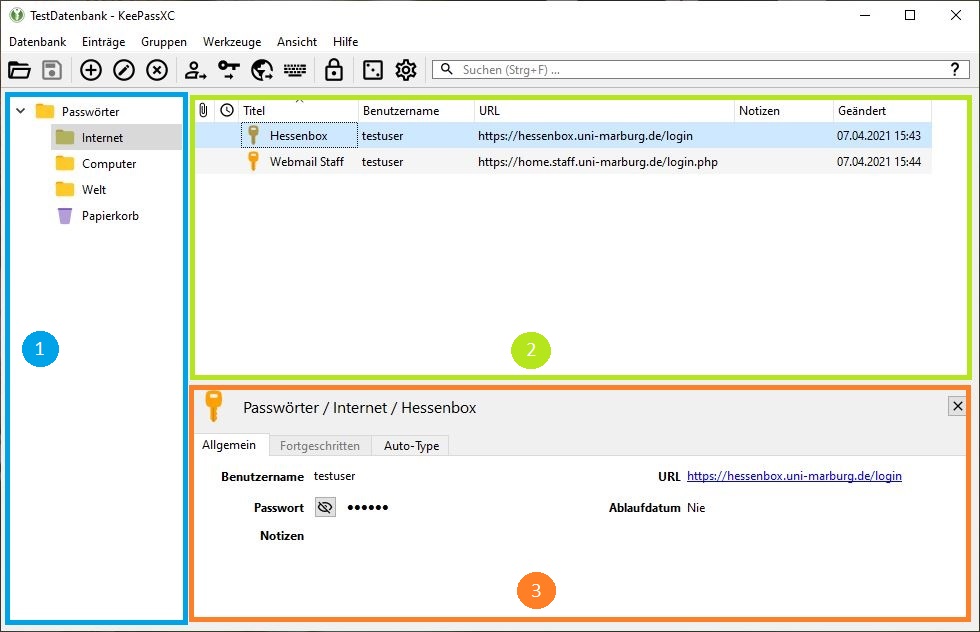
(1) Groups: entries and groups can be located below the main entry. It is recommended to arrange entries in groups according to topics. Within groups, groups can be created in turn. Settings from higher-level groups inherit to lower levels.
(2) Entries - An entry is created for each website or application for which credentials are to be stored in KeepassXC. The view displays all entries in the selected group. Each column can be resized, reordered, and shown or hidden as desired. Right-click on the header to see all available options.
(3) Preview - Displays a preview of the selected group or entry. The preview can be temporarily hidden using the close button on the right side or completely disabled in the application settings.
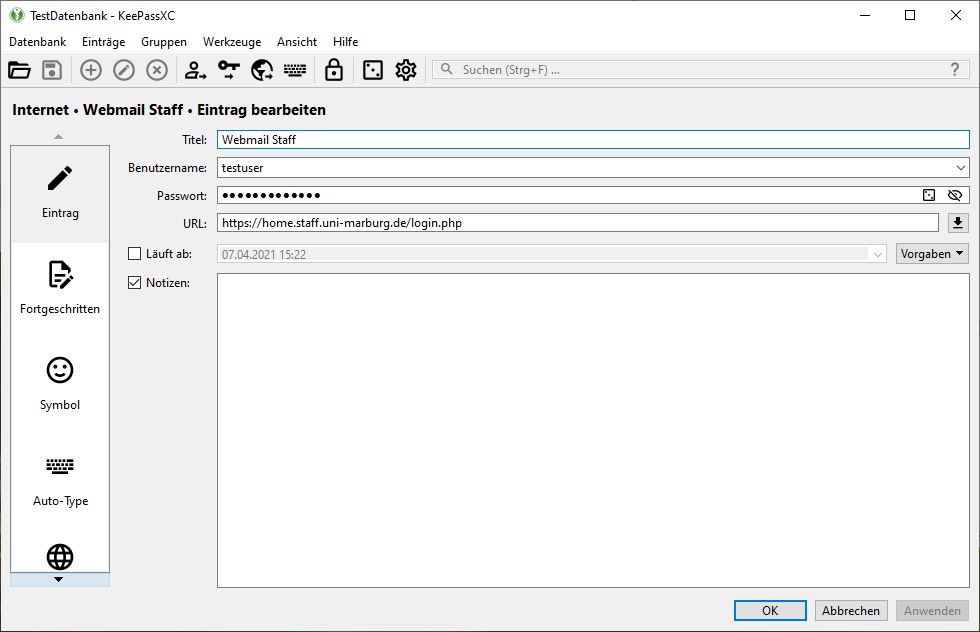
After clicking on an entry in the entry list, it is displayed in the preview below. A double click on the entry title opens the entry for editing.
Right-clicking on a group opens the following context menu. You can create new groups, edit the existing group or delete it.

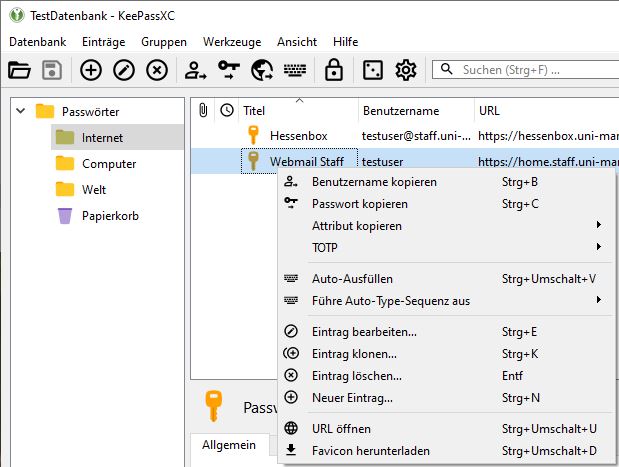
Right-clicking on an entry displays the context menu for entries. You can copy data from the selected entry, edit the entry or create a new entry.
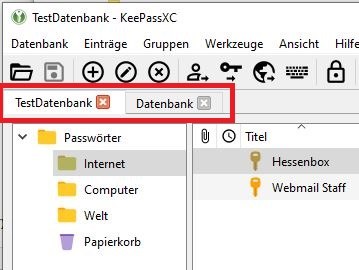
Several databases can be opened at the same time, they will be displayed in tabs.
Toolbar
The toolbar provides a quick way to perform common tasks with your database. Some items in the toolbar are dynamically disabled based on the information contained in the selected item. Any common action in KeePassXC can also be controlled with a keyboard shortcut.

- Database - open database, save database.
- Entries - create new entry, edit selected entry, delete selected entry.
- Entries data - copy username, copy password, copy URL, perform Auto-Type.
- Lock all databases: the KeepassXC application continues to run, but to access the database, the password must be re-entered
- Tools - password generator, application settings
- Search
Creating a new database
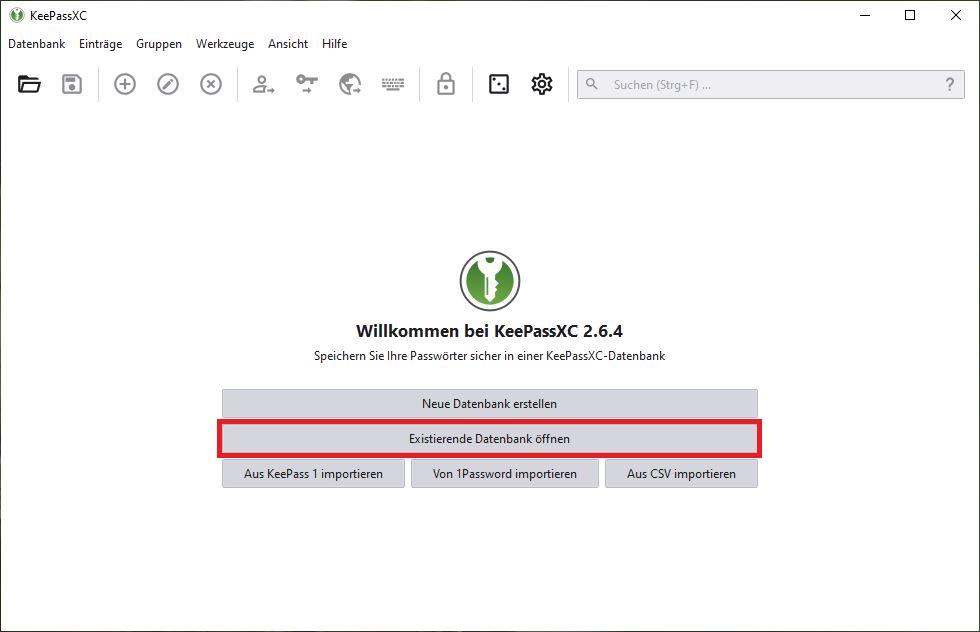
When you start the application for the first time, this view opens:
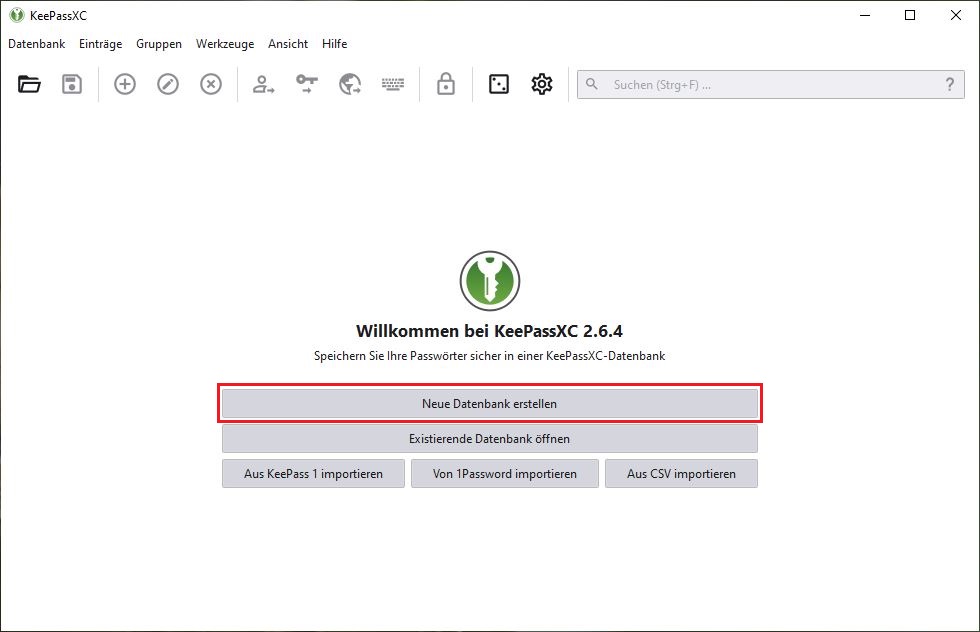
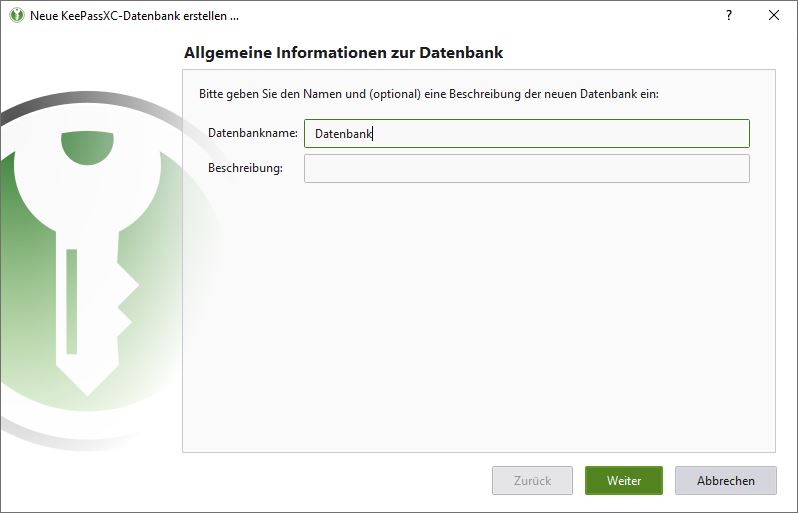
Click the Create new database button. The function can also be found in the Database menu item. A new window opens where you can enter a name and description for the new database. Then click on Next.
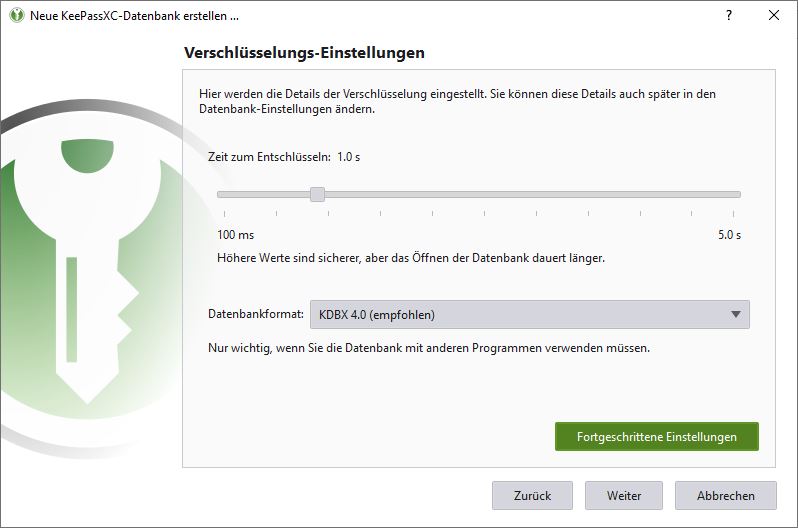
The Encryption Settings window will now open. You can leave the default settings and click Next.
In the next window you will choose a password for your database, which you will have to repeat in the second field. You can also use the password generator that you can click at the end of the first line.
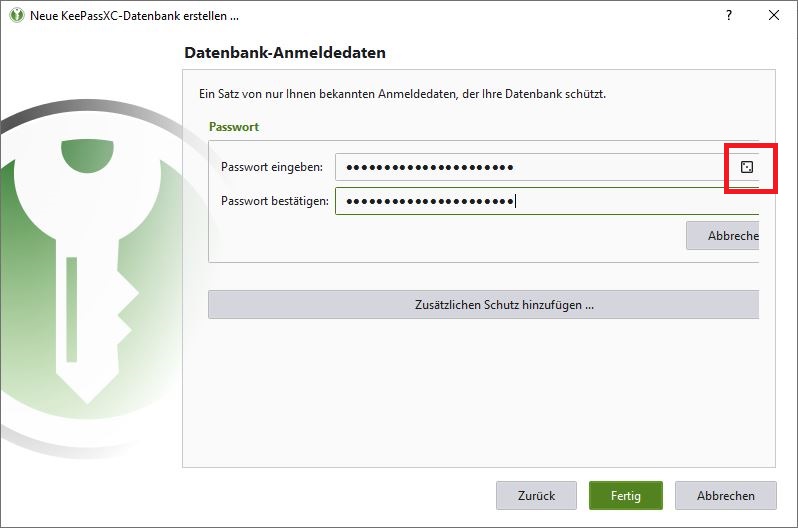
CAUTION: Keep this password for your database safe. Either memorize it or write it down in a safe place. Losing the database password may result in a permanent lockout of your database and you will not be able to retrieve the information stored in the database.
After clicking Done, a window will open where you can select the location for your database file. You can choose any file name. The database file will be saved on your computer with the .kdbx extension. It is fully encrypted at all times to prevent unauthorized access.
Save your KeePass database not only locally, but also on a network drive (for example, on your home drive) or in the Hessenbox. Otherwise, you would lose all your passwords if you accidentally delete the file on your local computer or your computer stops working.
Open Existing database
Open the KeepassXC application. Click the Open Existing Database button
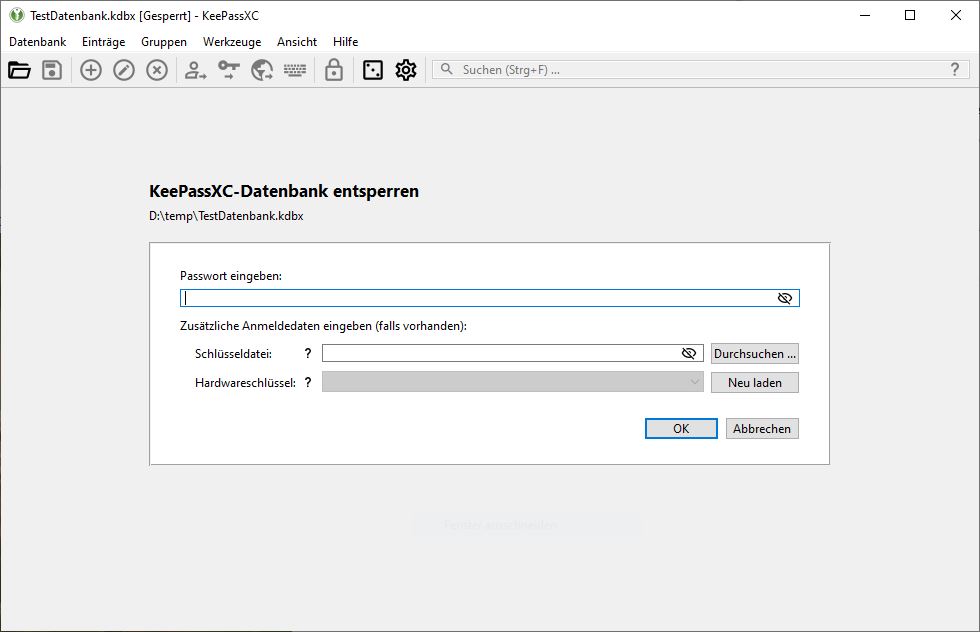
After you have selected the database file in the open file dialog you can enter the password for the database in the following window and open your database.
Password generator
The password generator allows you to generate random, strong passwords or passphrases that you can use for your applications and the websites you visit.
The password generator interface opens after clicking the cube icon (in the password line when editing an entry or in the toolbar). You can select the groups of characters (e.g. uppercase letters, digits, special characters, etc.) to be included in your password and the length of the password. KeePassXC randomly selects characters from the set.
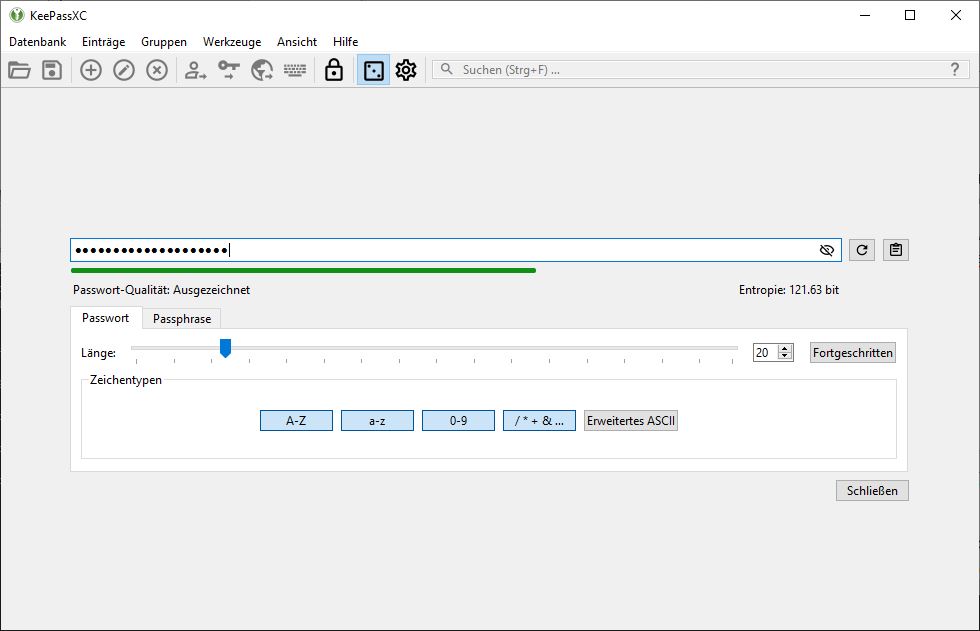
Instead of a password, you can also generate a passphrase. This is a random sequence of words that can be separated with a delimiter.
Browser integration
KeePassXC browser integration allows you to automatically retrieve usernames and passwords from KeePassXC and paste them directly into the appropriate fields on web pages. You do not need to manually copy and paste the data from your KeePassXC database into the fields.
The prerequisite is that your browser has the add-on installed that provides the connection between KeepassXC and the browser. On HRZ-installed PCs, the add-ons for Firefox, Chrome and Edge are usually installed when KeepassXC is installed.
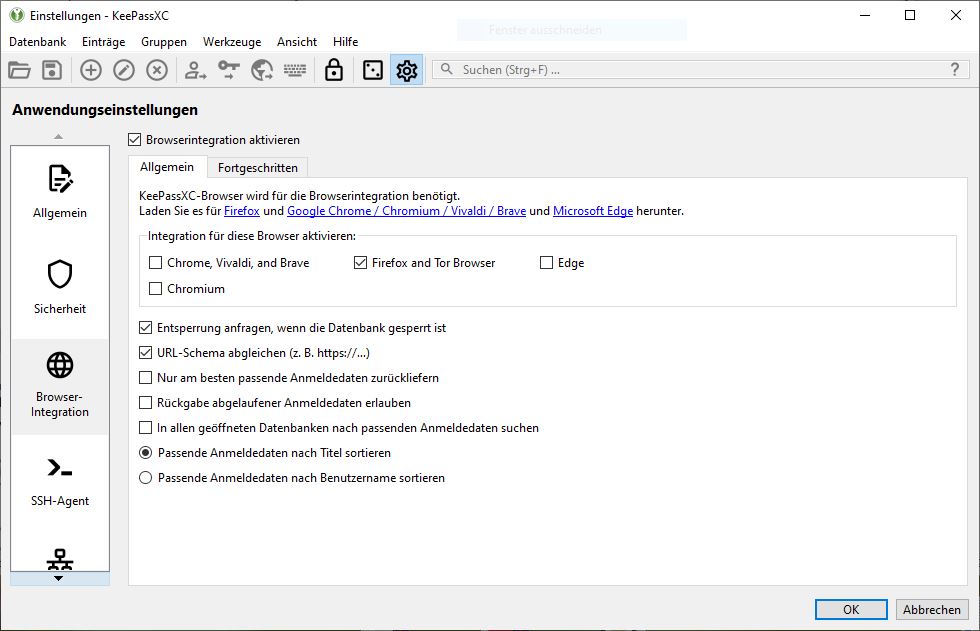
Then the connection from KeePassXC to your browser must be enabled in KeePassXC. To do this, click on "Tools -> Settings -> Browser integration" in KeepassXC and tick that you want to "Enable KeePassXC browser integration". Below that, tick which browser you are using: Firefox, Chrome or Edge. Leave the rest of the settings as they are and click OK.
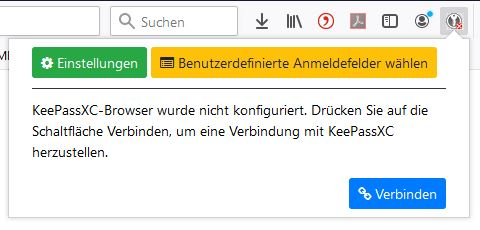
After (re)starting the browser, you can now see a KeePassXC icon in the toolbar in the upper right corner. The icon can look different:
KeePassXC is not running or not connected.
Connected to KeePassXC, but the database is locked
Connected to KeePassXC and ready to use
Click on the icon. If an error message appears check if KeePassXC is running and your database is unlocked. Only then the connection will work. If the connection is possible, a message appears that it still needs to be set up. Click on "Connect".
KeePassXC reports with a small window asking if you want to allow the "New key connection request". Choose a unique name for this connection, e.g. "Firefox_PC" and then click Save and Allow Access.
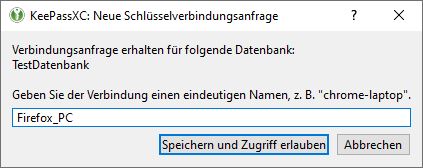
This establishes the connection. Firefox can now access the passwords you have stored in KeePassXC.
Using the browser extension
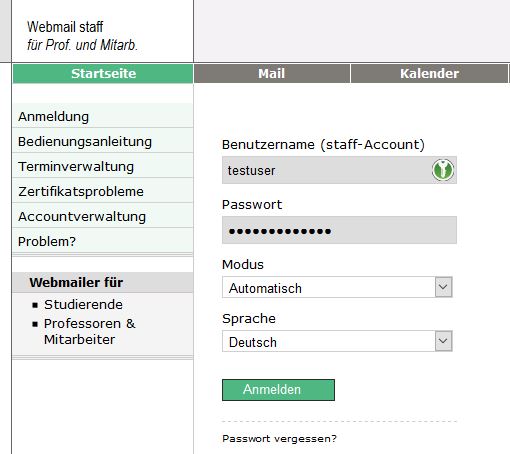
To use the browser integration open and unlock your database. In the web browser, open the URL you want to use with your database. In the username input field, you will see the green KeepassXC icon.
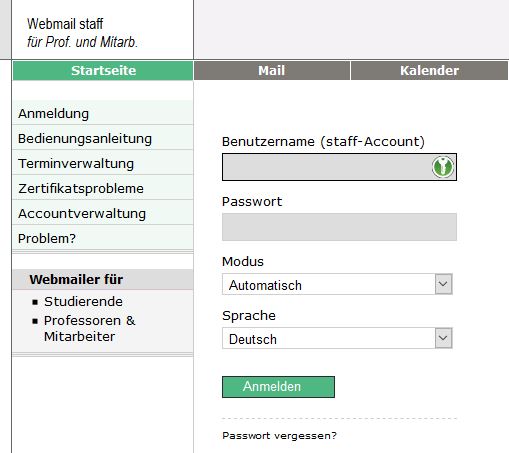
If there is an entry in your database with login data that matches this URL, after clicking on the green icon the login data will be automatically entered here and you can log in.