Main Content
Android (manually)
Entry requirements
- You have the login credentials for your university account (Staff or Students).
- Operating system: Android should be on the latest version available for your device.
- An existing internet connection on the device (mobile data, hotspot, guest- or other WiFi).
- Root certificate: The T-Telesec Global Root Class 2 certificate must be available and installed.
Installation of the root certificate
Follow these instructions: Check/install root certificate
WiFi configuration settings
1. Open Settings → Wireless and networks → WiFi.
2. Now select eduroam from the available SSIDs.
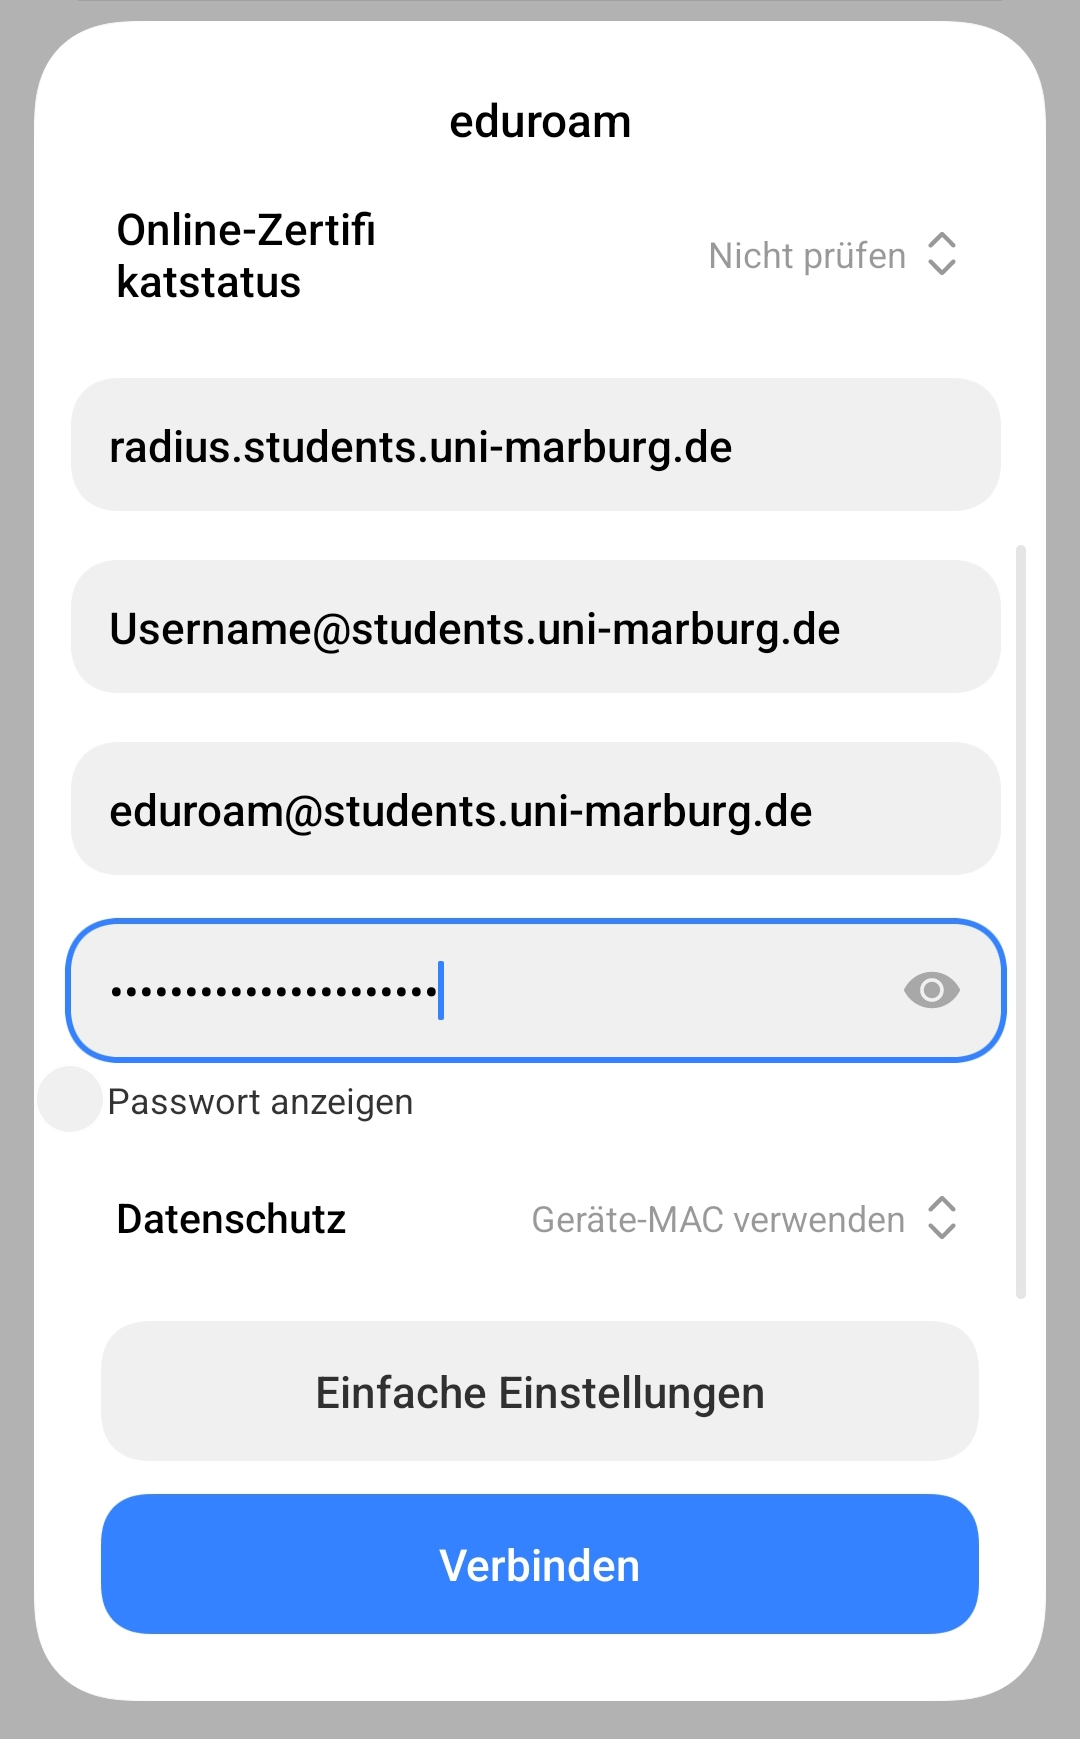
3. Now you must enter the following login data:
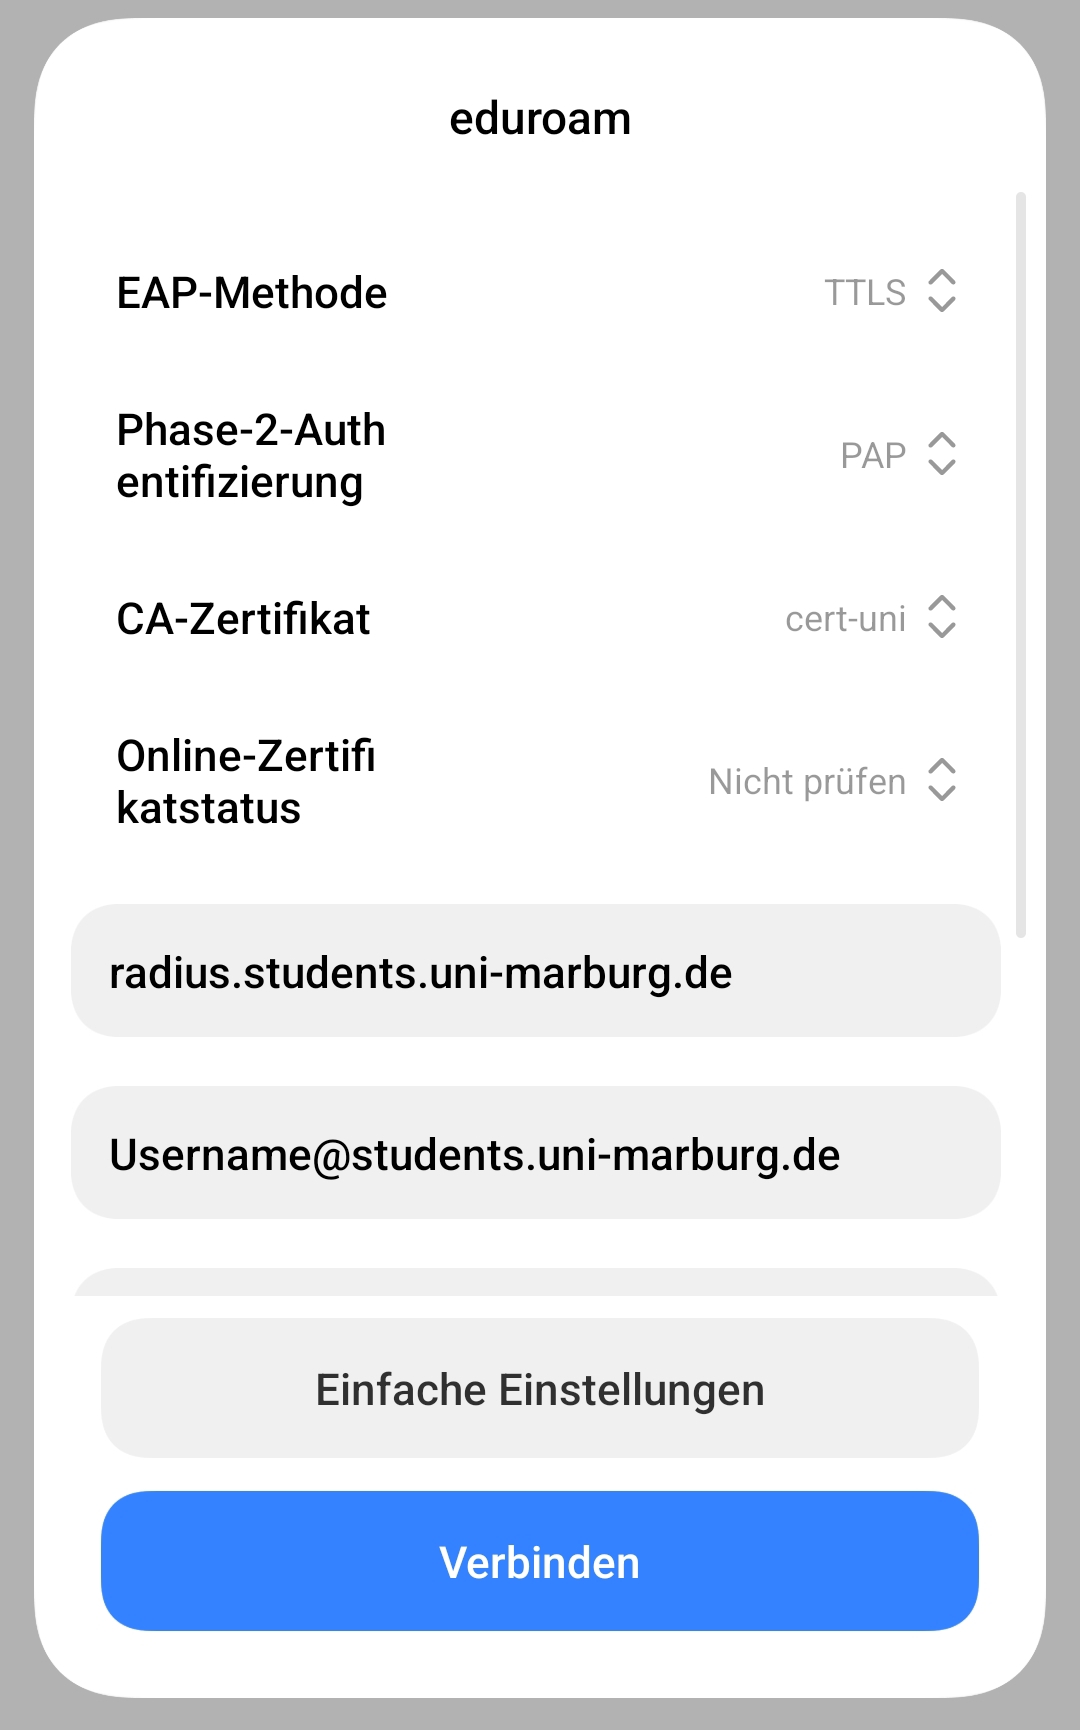
- EAP method: PEAP (Alternatively: TTLS-PAP)
- Identity: Your username
- Students: username@students.uni-marburg.de
- Staff: username@staff.uni-marburg.de
- Password: Your personal password
- CA certificate: The root certificate T-Telesec Global Root Class 2 or your manually installed root certificate.
- Online Certificate Status: Do not verify (or similar)
- Domain:
- Students: radius.students.uni-marburg.de
- Staff: radius.staff.uni-marburg.de
- Phase 2 authentication: MSCHAPV2 (Alternatively: TTLS-PAP)
- Anonymous identity:
- Students: eduroam@students.uni-marburg.de
- Staff: eduroam@staff.uni-marburg.de
- Privacy / MAC address type: Device MAC (no random MAC)
Important: Make sure that no space is added to the identity and domain details!
Please note: The eduroam username is not an e-mail address, despite the similarity. Aliases such as firstname.lastname@staff.uni-marburg.de do not work!
PEAP-MSCHAPV2:

TTLS-PAP:
Removal of previous configuration
If your device is already logged into eduroam, the old configuration must first be removed before installing the current profiles. To do this, proceed as follows:
1. Settings → Connections → WiFi . There, tap and hold the eduroam entry briefly until a new window opens.
2. Remove the network.
- Depending on the device manufacturer or Android version, the menus may differ.
3. As soon as your device no longer connects to eduroam, you can continue with the new setup.
If the connection does not work, please contact the helpdesk team:
e-mail: helpdesk@hrz.uni-marburg.de
phone: +49 6421 28-28282
Please include your username (uid) and the WiFi-MAC-address of the device with your inquiry.
All contact points for help and advice can be found at:
https://www.uni-marburg.de/en/hrz/help-and-advice/contact-points
As of: 2025-06