Main Content
Instructions for Outlook 2016
This document describes how to configure Outlook 2016 to access e-mail data. In Outlook 2013 and later, calendar and address book data from Webmail can be integrated via the "Exchange ActiveSync" protocol.
Step 1: Configure e-mail account
In Outlook 2016, the account setup must be started in the Control Panel.
Open the Control Panel either in the Start menu by typing the term or press 'Windows key + R' and enter 'control' and confirm.
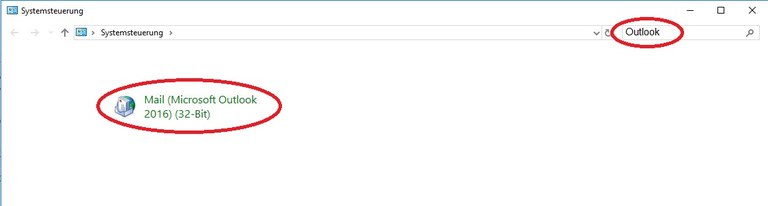
Now enter 'Outlook' in the search field in the upper right corner and click on 'E-mail'.
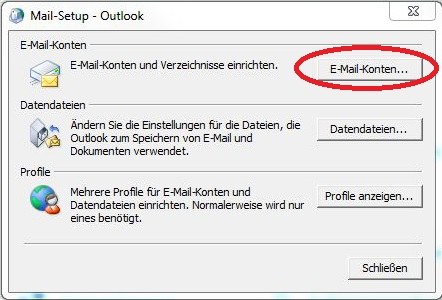
Now click on 'E-mail accounts' and then on 'New' and start the setup as described below.
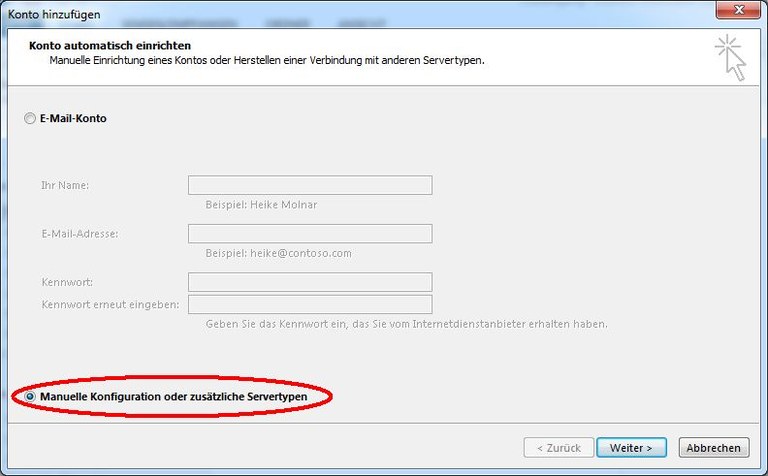
Please select „Manual configuration or additional server types”.
Step 2: IMAP server for incoming emails
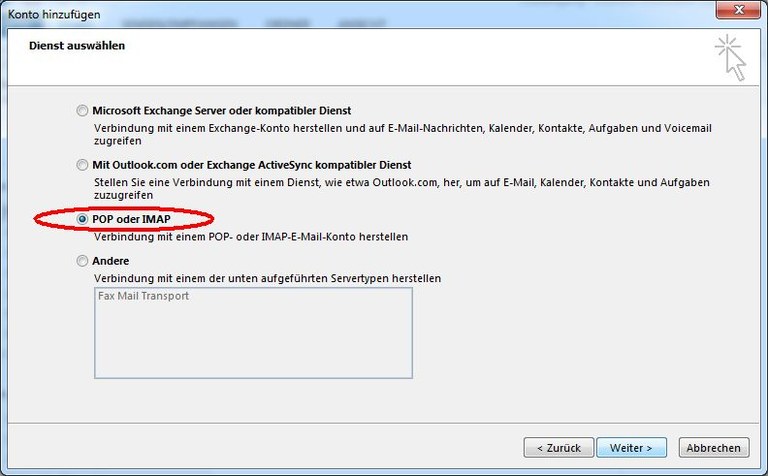
Now, select the server type "POP or IMAP":
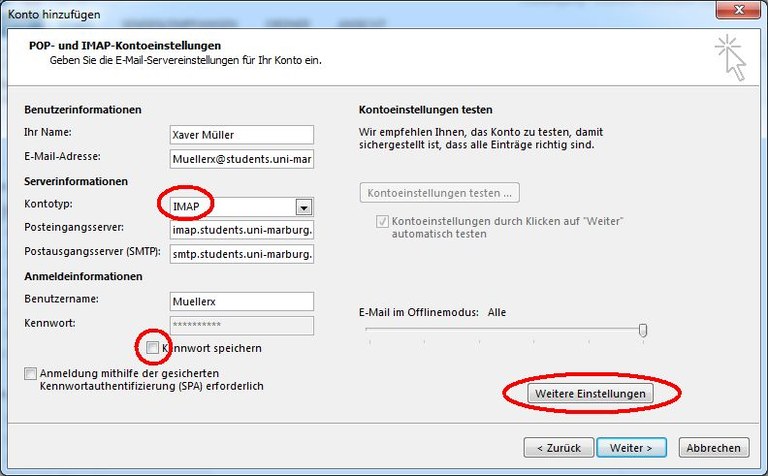
User information
At this point, it is particularly important to enter your e-mail address completely and correctly, as this address is literally used as the sender's address for outgoing emails. You can also enter an alias address associated with your account here.
Server information
Select IMAP as account type.
The following specifications must be selected for the server information:
| Staff | Students | |
|---|---|---|
| IMAP | imap.staff.uni-marburg.de | imap.students.uni-marburg.de |
| SMTP | smtp.staff.uni-marburg.de | smtp.students.uni-marburg.de |
Login information
Please enter your exact username.
The field 'Save password' should not be marked for security reasons.
The field 'Login with secure password authentication' must not be marked.
By clicking on "Further settings", you must now enter details for secure data transmission.
Step 3: SMTP for outgoing emails
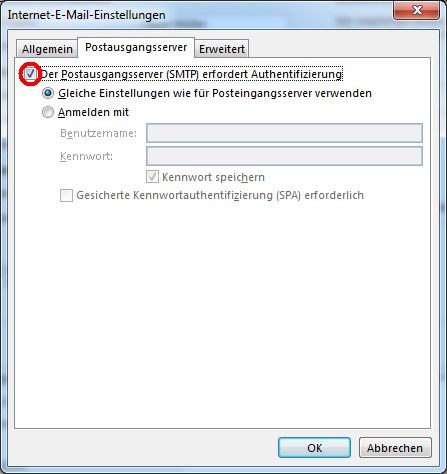
First, click on the tab "Outgoing mail server" and activate authentication, then switch to the tab "Advanced":
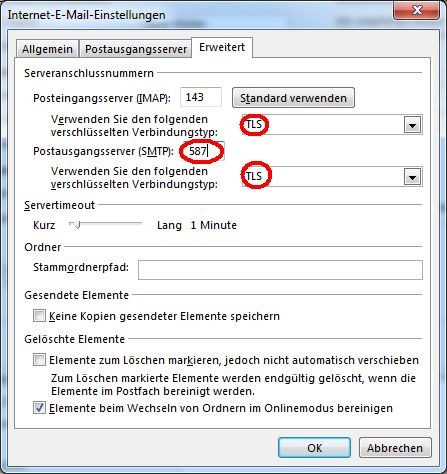
Select the connection type "TLS" (or "STARTTLS" for Outlook 2019) for both servers, port "143" for the incoming mail server and port "587" or "25" for the outgoing mail server.
After confirming with "OK" and "Next" the connection is checked by Outlook. If you added all data correctly, you can close the process with "Close".
The e-mail data is now available as a separate account in Outlook.