Main Content
Adobe User Account for Named Licenses
To use your personal (Named User, NUL) Creative Cloud or Acrobat DC licenses, you need an Adobe user account. This is an Enterprise ID consisting of your work email address and a specific password.
1. Creation by asknet
The user account (Enterprise ID) and/or the assignment of the procured NUL product is done via the portal of the trading partner asknet / Academic Software: portal.academicsoftware.com
Log in there with your @uni-marburg.de address (no separate account / password needed), you will be asked to complete the login via Shibboleth.
- Be sure to log in under the account to which the license is to be assigned.
(There is no further selection option before license assignment.) - Please redeem the voucher directly under "Home" (not under "Software").
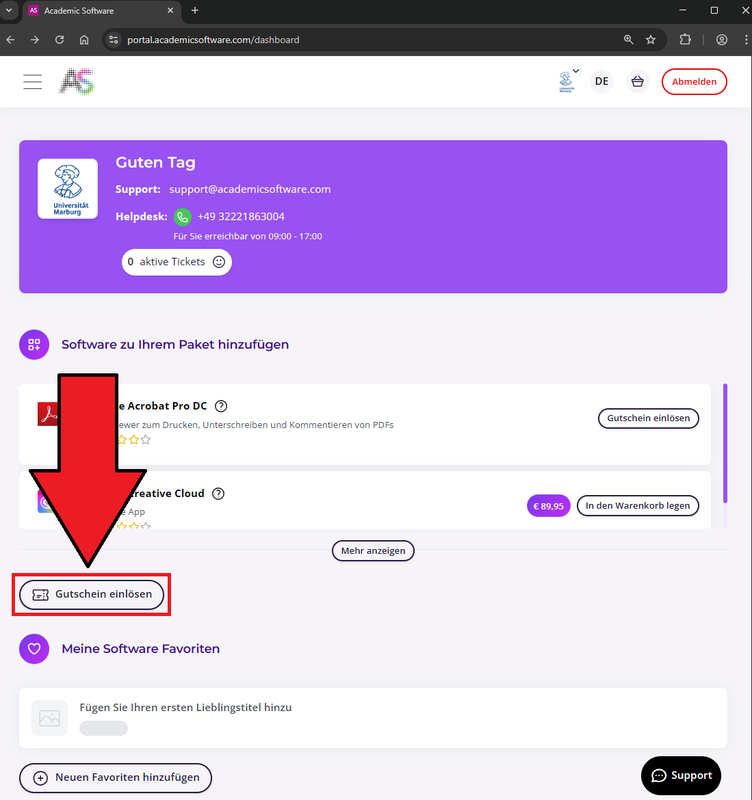
Select "Redeem voucher".
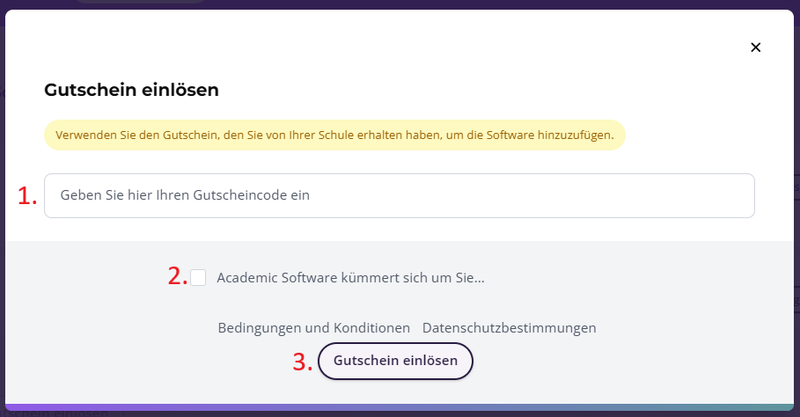
Enter the code (you can find this in the order confirmation from asknet), activate the checkmark next to "Academic Software takes care of..." and confirm with "Redeem voucher".
Once your user account has been created, you will receive a system message from notifications@adobe.com.
Note: Do not be confused by the term "LRZ". Adobe has added this to all contracts under the LRZ framework contract.
2. Complete user account
A link in the email leads you to a page where you can complete your user account by entering a password.

If you no longer have access details or are not sure whether an Adobe Enterprise ID has already been created for you, you can try to reset your password at Adobe.
3. Installation
For installations on managed devices, please contact your responsible IT administration, installation here is done via software distribution (opsi).
For information on installation on systems not maintained by the HRZ, please refer to the email from Adobe notifying you of the licensing. Alternatively, download the Creative Cloud installer (or the Adobe Acrobat DC Installer) directly from Adobe.
4. Start application
Now start the Creative Cloud Desktop App, Acrobat DC, or any other current Adobe application. If you are already logged in with a personal Adobe ID, please log out first.
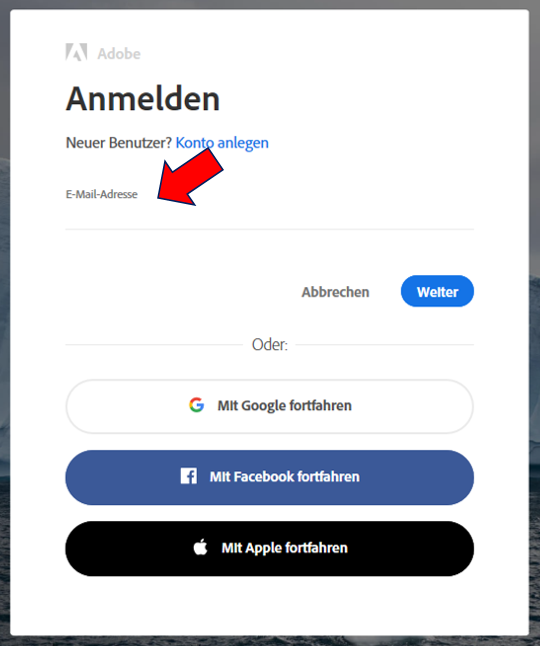
5. Enter email address
In the login dialog displayed, please enter your fully qualified email address. This means using exactly the email address to which Adobe sent the invitation in step 1..
- Correct:
- muellerx@uni-marburg.de
- Incorrect:
- xena.mueller@staff.uni-marburg.de
- mueller@uni-marburg.de
- mueller85@gmx.de
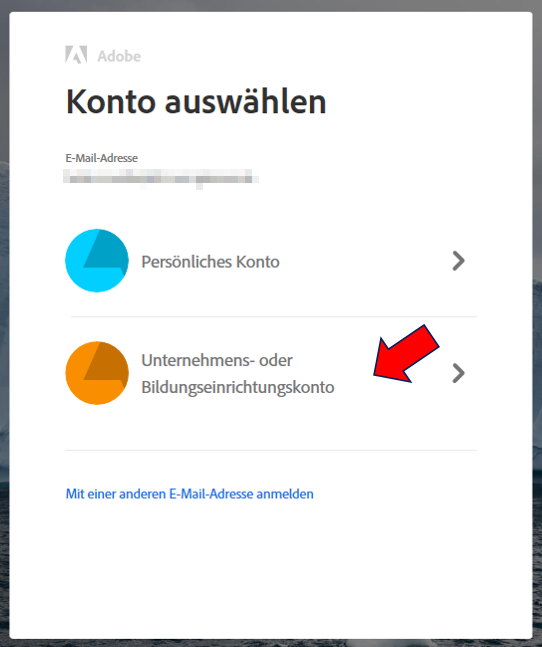
6. Select account type
Please select the option "Enterprise or School account" here. If you already have a personal account with your work email address, no new licenses will be available under it.
7. Enter password
Now enter the password you created under 2.. If necessary, you can reset the password yourself via the "Reset password" link.
