Main Content
Instructions for MacOS
Step 1: Add account
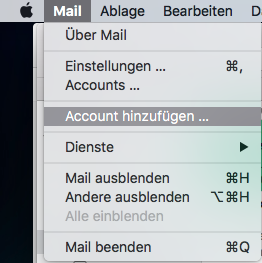
When starting the program for the first time, the Mail Assistant opens automatically. It helps you to configure e-mail accounts for existing e-mail services. If you have already set up the program for another e-mail address, you can restart the Mail Assistant in the menu bar under Mail -> Add Account to set up another address.
Step 2: Select provider
After you have started the mail wizard as described above, you must first select the provider.
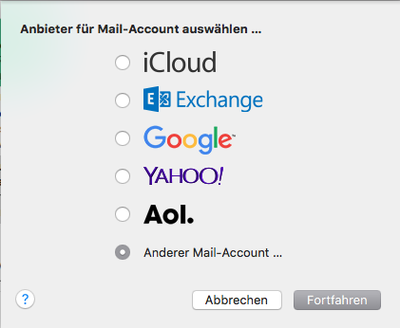
Please mark "Other mail account" and confirm with "Continue".
Step 3: Add a mail account
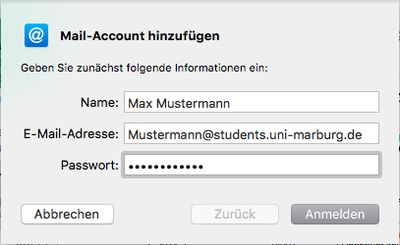
Now please enter your e-mail address in the form username@students.uni-marburg.de or username@staff.uni-marburg.de.
Continue with "Log in".
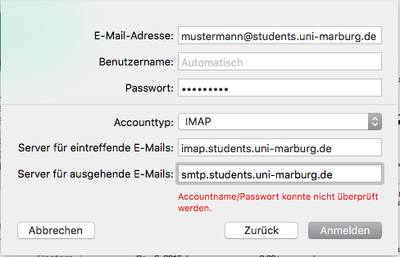
Step 4: Enter mail server data
The mail wizard needs the exact server data to log in. You can ignore the error message "Account name/password could not be verified".
Please set IMAP as account type.
Incoming mail server:
for students: imap.students.uni-marburg.de
for employees: imap.staff.uni-marburg.de
Outgoing mail server:
for students and staff: smtp.uni-marburg.de
If you entered one of your alias-addresses as e-mail-address, please enter your username at Username:
Now click on "Register".
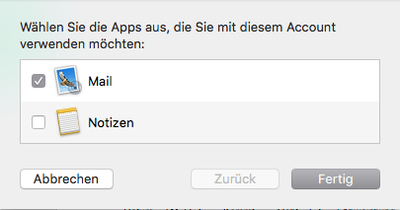
Step 5: Assign an account
Please uncheck the "Notes" app and click "Done". The setup is now complete and you can retrieve your university e-mail address with Apple Mail.
In case, you have problems sending emails
Check outgoing mail server data
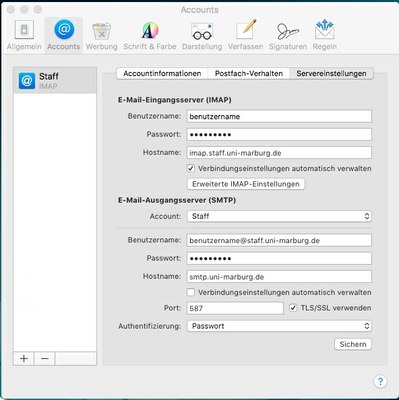
The mail wizard usually adopts the settings for the outgoing mail server automatically during the initial setup. Normally, you do not have to change these settings. However, if you encounter problems sending emails, please check the data stored under Mail -> Settings -> Accounts -> Students-/Staff address -> Server settings -> Outgoing mail server (SMTP). You must enter the following parameters there:
Username and password of your account
hostname: smtp.staff.uni-marburg.de resp. smtp.students.uni-marburg.de
port: 587
Using TLS/SSL: Check the box
Authentication: Password