Main Content
Outlook Classic Instructions
This document describes how to configure Outlook Classic to access your email data.
However, we would like to point out that we recommend Thunderbird and can only provide very limited support for Outlook.
Configuring an Email Account
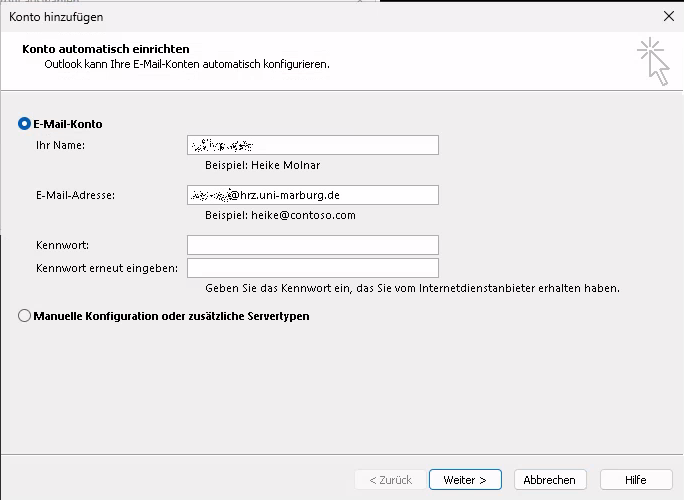
In Outlook Classic, you enter your email address and password. The settings are then automatically determined.
User Information
It is particularly important to enter your email address completely and correctly, as this address is used verbatim as the sender address for outgoing emails. You can also enter an alias address that belongs to you here.
Server Information
If manual configuration is necessary, select IMAP as the account type.
The following information must be entered for the server settings:
| staff | STUDENTS | |
|---|---|---|
| IMAP | imap.staff.uni-marburg.de | imap.students.uni-marburg.de |
| SMTP | smtp.staff.uni-marburg.de | smtp.students.uni-marburg.de |
SMTP for outgoing emails
First, click the "Outgoing Server" tab. Authentication must be enabled there. Then switch to the "Advanced" tab:
Here, the connection type "TLS" (or "STARTTLS" in Outlook 2019) must be selected for both servers. Port "143" must be selected for the incoming mail server, and either port "587" or "25" can be selected for the outgoing mail server.
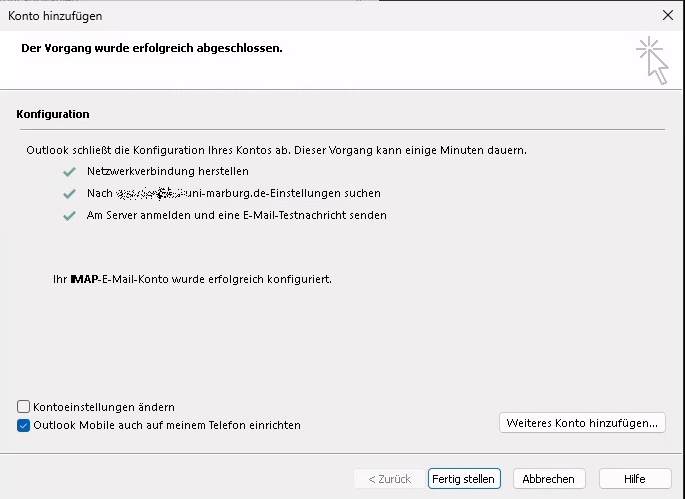
After confirming with "OK" and "Next," Outlook will check the connection. If all data has been entered correctly, the process can be completed by clicking "Close."